Orion (constellation) in fixed tripod


Dec 2011 - 40x10sec - ISO6400
Câmera: Canon T2i unmodified - Mount: Fixed Tripod
Guiding: No

The Sun in Oct 30 2011

Aug 2011
Telescope: coronado PST - Câmera: Celestron Neximage - Mount: CG-5GT

A mammoth walking on the Sun

Aug 2011 
Telescope: coronado PST - Câmera: Celestron Neximage - Mount: CG-5GT

DSO from the window of my apartment: M11 - Wild Duck

Aug 2011 - 56x30sec - ISO6400
Telescope: Orion Premium 102mm Refractor - Câmera: Canon T2i unmodified - Mount: CG-5GT
Guiding: No

M16 - Eagle Nebula

Aug 2011 - 24x180sec - ISO1600
Telescope: Orion Premium 102mm Refractor - Câmera: Canon T2i unmodified - Mount: CG-5GT
Guiding: Celestron TravelScope 70 - Neximage unmodified

Barnard 33 - Horsehead Nebula

Aug 2011 - 11x300sec - ISO1600 and 4x180sec ISO 3200
Telescope: Orion Premium 102mm Refractor - Câmera: Canon T2i unmodified - Mount: CG-5GT
Guiding: Celestron TravelScope 70 - Neximage unmodified

NGC 6334 - Cat's Paw Nebula

Aug 2011 - 22x300sec - ISO1600
Telescope: Orion Premium 102mm Refractor - Câmera: Canon T2i unmodified - Mount: CG-5GT
Guiding: Celestron TravelScope 70 - Neximage unmodified

NGC 4945

Aug 2011 - 25x120sec - ISO 1600
Telescope: Orion Premium 102mm Refractor - Câmera: Canon T2i unmodified - Mount: CG-5GT
Guiding: No

NCG 253 - Sculptor Galaxy

Aug 2011 - 24x90sec - ISO 3200
Telescope: Orion Premium 102mm Refractor - Câmera: Canon T2i unmodified - Mount: CG-5GT
Guiding: No

M27 - The Dumbbell Nebula

Aug 2011 - 5x180sec - ISO1600
Telescope: Orion Premium 102mm Refractor - Câmera: Canon T2i unmodified - Mount: CG-5GT
Guiding: Celestron TravelScope 70 - Neximage unmodified

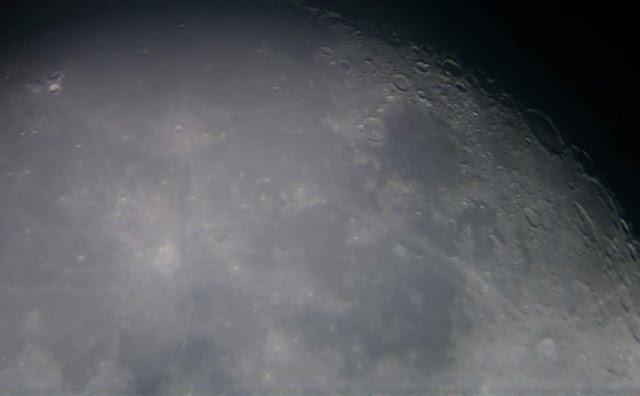
Moon - Craters

May 2011 - 1/40sec - ISO800
Telescope: Orion Premium 102mm Refractor - Câmera: Canon T2i unmodified - Mount: CG-5GT
Televue Big Barlow 2x - Kelner 20mm

First photo of the moon with a telescope Apochromatic

I just take my first photos using the Orion Premium 102mm ED, the telescope that makes me go to New York to realize the dream of having an apochromatic telescope.

Clique na imagem para ver em tamanho grande

Using a Canon EOS T2i camera attached to the telescope directly, without the use of eyepiece, I took this first photo with this telescope. The result made ​​me really happy.

The telescope has a focal length of 710mm. I do not know exactly which equates eye sensor Canon T2I, but compared to the 18mm wide-angle 18-55mm lens that comes originally with the Canon, I guess to put the Canon attached to this telescope has become simply a lens of 710mm, which generated a 40 times zoom.

To attach the camera to the telescope I had to use two accessories that I purchased at Adorama in New York. An adapter for connecting cameras to the telescope (http://www.adorama.com/TVCA.html) and a ring to turn my camera on this particular adapter (http://www.adorama.com/LNTMEOS.html) .

The ease of use compared with the camera lens pointing to the eyepieces was impressive.

Binoculars and Tripods: worth it?

Binoculars are fantastic to look at the sky. The small increase is fully offset by the large field of view, providing fantastic images that illuminate both eyes of the beholder, against only one of the telescopes. And when we go looking for a pair of binoculars, so we were tempted by bigger lenses, like 70 or 80mm. But unfortunately many people says that they are too heavy and therefore we, sedentary nerds, will not have the strength to carry these monsters for more than a few minutes.

A miracle solution, of course, is on a tripod. I read it all the time on forums Astronomy. So if you dropped with a parachute on my blog here that is looking for binoculars and tripods, before you rush to buy a site binoculars 20x80mm three pounds, thinking they have wonderful nights of observation using a tripod, I wanted make some notes.

I've had the experience of using a binocular with tripod and have to say: it was horrible. Unlike refractor telescopes normal binoculars does not come with a diagonal of 90 degrees, which allows the observer to look down or up forward when you're watching the sky. And that, believe me, generates a tremendous discomfort. Moreover, if you want to look up using the tripod, so this will have to be taller than you. In my case It is not easy to find tripods over six feet, my height.

The solution would be to use the tripod while sitting in a chair, but you will soon realize that you'll got totally immobilized, taking the binoculars to his best quality is the ability to wander freely across the sky in a few minutes.

In astronomy the best viewpoints are in the highest places of the sky. The farther the horizon less atmosphere the light of the star have to cross to get to your eyes, which makes a big difference. I spent a few months using a binocular on a tripod until I realized that it was legal for use on terrestrial objects, but for astronomy he soon became useless.

A good and great binoculars for astronomy would be like the following, which has 90 degree diagonal materials, providing the comfort needed to observe objects higher on the horizon, but unfortunately these devices are extremely rare in Brazil (my country) and also very expensive.

Binocular prisms with large diagonals of 90 degrees, which ensures comfort in the observations. Image http://www.teleskop-express.de/

The tip I give is: if you do not have binoculars and want to buy one to start astronomy, does not fall into the illusion of buying a unit of three pounds and a tripod thinking that all your problems will be solved. Stay in a unit with a maximum 60mm, but know his weight before buying. In the end, I must know that the a friendly binoculars of the astronomer will always be 50mm, with a maximum increase of 10 times, which will be always with you and will be always at hand to study and contemplate the sky, ensuring comfort and priceless hours of observation in a goodnight.

Another problem related to tripod and binoculars is that will not be any small tripod with 5mm thick legs that will let you good observations. The tripod has to be strong and firm not to shake too, so it will not cost cheap. In the end, the binocular along with a good tripod will cost more than 1000 dollars. If dealing with a encumbrance of these, at this price, then leave immediately for a telescope.

But wait, all is not lost. There is an interesting solution, in my opinion, if you are able to do, can solve the problem and make the observation of the sky with binoculars on tripods quite enjoyable. It would make an apparatus as shown below, with a mirror-aligned binocular, playing the prism diagonal. I imagine that with a device like the view with binoculars should be very fun and comfortable, the way it should be. Only well worth it.

A mirror placed below the binoculars, as this interesting homemade tripod, lets bring binoculars with the necessary comfort. Image http://www.swindonstargazers.com/

My second Picture of the Sun

The rain returned strongly here in Brasilia. When I finally thought I'd have a weekend with clear skies, the clouds covered everything with force.

But this afternoon, for about twenty minutes, the sun came out and I ran to the window with the Coronado PST to trying some pictures with a Sony CyberShot  attached to the telescope.


In such a short period I had time to test for almost nothing, but I got the picture below of some solar flares that appeared.

Solar proeminences in March 10, 2012.

It is a humble image. Who knows the small Coronado PST knows that he is capable of much more than that. But I'm learning and it would not be as fun if it was easy is not it?


Compared with my previous picture, since there is a trend visible. The solar flares are more defined. It's a shame that it is difficult for me to use the Coronado PST during the week because I work during morning and afternoon, I wish I could do more tests with the cameras.


My first photo of the sun with a Coronado PST

I'm not very proud to show the photo below. There is nothing in it that deserves some attention. It is a record of my lack of technique.

But it is the first photo I took with a small solar telescope called Coronado PST (Personal Solar Telescope), a popular option to expensive solar telescopes. This telescope has an H-Alpha filter, capable of producing images much better than simply identifying sunspots.


In this first photo, taken on a cloudy day and windy, I got my first records of solar flares, which appear on the edge of the Sun

Photo of Saturn taken at dawn today

Finally the sky cleared here in Brasilia last night. Then I could go to the balcony of my apartment and try to get a good image of Saturn.


I had a big job, but the result left me very happy:


It's a good result for an achromatic refractor of 90mm. For this photo I used an adapter that secures the camera to the telescope eyepiece. It is crucial for the video recording. My telescope has no accompaniment, but the program Registax 5.1 aligns the frames. I'm already starting to dominate better the Registax.

A big hug to everyone!

Photos of the Moon using a 6mm Kokusai Orthoscopic eyepiece and a 90mm Achromatic Refractor

While the sky of Brasilia looks like it will stay cloudy forever, I could only get some short videos I made last week and play a little with them.

I remembered that I had some images recorded with a 6mm Kokusai, which I recently acquired. With these eyepieces could get much more zoom of the moon than in previous posts.

I liked this here, it almost seems that I'm flying over the moon


Of course, I still have a lot to improve and I can take more of my achromatic refractor of 90mm, but I'm quite happy with the result in these images.

New photos of the Moon and Jupiter, with a 90mm refractor telescope, Barlox 2x and 10mm eyepiece.

I am now with my old 90mm refractor telescope at home, in my apartment in Brasilia. My mother got very sad that I have taken the telescope from her. She thought her living room was beautiful with the telescope in the corner and was delighted to see how whenever a child went to the farm, he went straight to it.

But I'll never improve in astrophotography without my telescope besides me. So, these days I could take this picture of Jupiter from the window of my apartment which got no better than the one I took five years ago.


Yesterday I decided to take some pictures of the moon, but clouds spent their time in front of the Earth's satellite, so I did not have much tranquility. But using an eyepiece plossi 10mm, a 2x barlow and a Bloggie Sony camera that shoots in high resolution, I could take the images below.

This one highlights the crater Tycho, and the center. The photo was processed in black and white
This further shows the crater Copernicos, left, and again Tycho, right. And can also clearly see the sea Homorum, at the top right. This photo was processed in color, note the subtle difference.

I have used an adapter purchased at astroshop that connects the camera to the telescope, but I still could not use the full potential of it. I wish I had had time to take some pictures with a 6mm orthoscopic eyepiece I have, but I ended up not working yesterday. I'm sure I'll get some time here better photos in the future.

Humble Pictures of the Night Sky in Brasilia

I follow taking the first steps in astrophotography, particularly with regard to deep sky objects. The first thing I need is to buy the equipment really suitable, what I'm not have yet. I Should buy some good equipment from the next month, but until then I'll play with what I have. Yesterday I used a pocket camera, a Sony DSC-W120, and hence home amid the lights of Brasilia tried to take some pictures of the sky. See how they got:

Canis major Constellation

South Crux
The camera used is unfortunately a camera that does all configurations for the photographer, which is not ideal for astrophotography. The right camera is one with many manual features. It's funny how in photography terms like "Automatic" and "Digital" (for digital zoom) are things that not always are good and often is better hear something like "Manual" or "optic".

In this carnival I hope to take some pictures and try to show some new developments in astrophotography, particularly planets.

A big hug!

The first telescope: Step One: Accept that quality has a price!

Once I have made a post called "Things you'll learn when you want to buy a good pair of binoculars," I felt compelled to do something similar about telescopes.

But before I begin, I would say that if you want to get into astronomy and still not have an observation instrument, forget this post and go see about binoculars. Because telescopes are excellent instruments, but for the learning of astronomy binoculars are much better.

The first thing you will learn about telescopes, at least when searching on your new one, is that: In any Brazilian shopping there are any electronics stores or gift stores with telescopes in their windows, usually 50 to 70mm refractors and reflectors of 76 to 114mm and always brands that are considered by experienced amateur astronomers as of questionable quality. These telescopes have always been a little ad on the side that says they increase 300, 400 or even 675 times, and we are led to think that the one that increases the image 675 times is the best among all. Well, if you go looking at a few sites about Astronomy you will discover that it does not exist. Never buy a telescope for the announced increase, and why? Why the rise of a telescope is completely defined by eyepieces or Barlows you put into it. Buynew eyepieces and Barlows you will change the power of a telescope.
The tipical telescope from a store ina mall

It is clear that the telescope advertised as capable of 675 times will increase with an eyepiece and a barlow that will be able to achieve an increase of 675. So I'm talking nonsense? No, because you will get this increase, but what you will see in the eyepiece when looking at Jupiter, for example, will be just a blur not even round. This will be a miracle if you manage to keep the planet in the visual field with the tripod that come with these telescopes. In 675x, even when using Earth observations will be impossible to distinguish what you are seeing, so bad the image will be.

What makes the difference for real in a telescope is called "Opening". It is the size of the primary lens (in the case of a refractor) or the primary mirror (in the case of a reflector). To be clear, this is the thickness of the telescope. The thicker a telescope is, the greater is its opening. The opening is important because the larger the lens or the primary mirror is, the greater the ability to absorb light of a telescope. Opening is so important that it almost always part of the name of a good telescope and not its increasing.


To the right of a 60mm refractor telescope aperture and left a 150mm aperture refractor.

Another bad feature in these telescopes sold in malls is that their accessories are not standardized. Eye of good telescopes for example (the small lenses where you put your eye), tend to be standardized at 1.25 or 2 inches, it fits well in almost all models, but eyepieces of telescopes sold in malls usually have a different size pattern.

But even worse is the quality of these equipment. Parts are usually made of plastic bum. I've had a telescope shopping. Yes, I have to confess, even to show that I really saw how they are. It was a Tasco 50mm refractor. I remember when he looked at Jupiter, it was sometimes difficult to stop the planet before swinging out of my field of vision. When I bought an Orion 90mm refractor, the first difference I noticed was the strength of the assembly. The flickering images definitely were no longer a problem for me.

But there is still a worse thing than buying these telescopes 60mm in malls, which is to buy a telescope in a toy store. If you enter a Toy Store and ask a salesperson if they have a telescope, why your son wants one. You can rest assured, you will be able to make him give up astronomy for a long time. One may say - No! With such a telescope you will arouse the curiosity of the boy. "But I can tell you from experience, I gained such a telescope as a boy, and the only thing you can do with them is some features on the moon, and over! Pointing to the moon will be the starting and the end of the astronomical career of your child. You can put the toy back in the box. 
A Toy Telescope

As with binoculars, you have to accept that there is a price to pay for a telescope at least reasonable. If you plan on taking pictures of galaxies and nebulas with your telescope, do not think you'll get acceptable results without spending too much, and believe. This much can be much more than you're imagining.

I'm telling you that if you do not want to spend, then give up? Of course not. You do not need any money to practice astronomy. There are countless books on the subject that will be a thousand times more useful than a toy telescope, or even a 60mm refractor made ​​of plastic. If your child wants to start astronomy and you do not want to spend 800 reais (400 dollars) with a good telescope, or even 200 reais (100 dollars) with a good pair of binoculars, how about giving a good book of Astronomy for him. There are some excellent. Why not bring it to a library and find books with him.

The colorful sky of Brasilia

Itook this picture from inside the car of a friend yesterday, with a Sony Bloggie camera, which has quite modest resources.

It was a shame I was not able to take a better photo (the car was moving and had a little dirt on the window). Yes, the picture was very beautiful, but with such a sky it could have been much better. The blue and yellow hues of the sky were spectacular!

Astrophotography - The Milky Way as a work of art

Today I decided to blog some photos of the Milky Way, taken with cameras of high exposure and without the use of telescopes. Recalling that the Milky Way is a barred spiral galaxy but we do not see it that way, but as a path through the midst of heaven, for the simple fact that we are inside.

The picture below was taken in Arizona, a region called Kofa Mountais. The photographer's name is Richard Payne.


.

In another picture, taken from an inflatable boat, we have the amazing interaction between our galaxy and a lake, coming to look like a mirror. The streak of light that appears in the flash image is a satellite Irídiun. The credit goes to Tony and Daphne Dallas. from: astrophoto.com.

This one was taken in Texas, It makes our galaxy looks like a continuation of the road. The author of the photo is Larry Landolfi


When an area is totally free of artificial lighting, and in a new moon night, we can see the sky much like these pictures (without the colors only). And this without any use of the instrument, only with our eyes. It is a unique show and it's free. It's one of the greatest shows that you can see in your life. Unfortunately, due to modern lifestyle, urban living and pragmatic, a very large number of people spend their lives without ever contemplating the galaxy with his own eyes.

Terrifying clouds approaching the Guara (Brazilian Federal District)

I do not remember seeing clouds just as frightening as those that approached the Brazilian city of Guara this afternoon. It looked like the end of the world coming over the satellite city. Notice that the sun still shone brightly as the clouds approached

Plane passing in front of Jupiter while filmed through a telescope

I found this very cool video in Orkut. The guy was shooting the planet Jupiter with his telescope when suddenly a plane passed in front of the view.

Note the turbulence caused the aircraft in the atmosphere, creating a spectacular image, it seems that we are seeing the reflection in the water and someone threw a rock next to it!

Things you will learn when you want to buy a good binocular (in Brazil)!

Excited to be returning to practice astronomy, I decided to compile below some things I learned about binoculars during this time. Some go completely against what I imagined when I started to practice astronomy. I hope that helps those who want to buy a pair of binoculars.
The first thing you need to know is about binoculars that are sold from street dealers in Brazil for US$10 to US$20. They are pure garbage, made with plastic lenses. Comparing the quality of these binoculars with something decent is a joke. In many cases you see better without them than with. If you want to buy a good pair of binoculars in Brazil, You will have to agreed paying a couple hundred dollars. Do not commit the crime of giving a US$10 binoculars to his son, much more if he is interested in astronomy. Unless you just want him to forget this practice.
The harsh reality is that binoculars have absurd prices in Brazil. A US$150 model found in a Brazilian store, costs about thirty dollars in the United States. One that costs US$1000 here, costs about US$ 300 there. Moral: products seen as high level here, as the cheapest binoculars from Celestron or Orion, are seen as toys in the United States, while the products seen by them as quality products, to us are products of the English aristocracy.
It is when you look at the night sky that you really find the quality optics of a binocular. Products that look perfect when you're looking at a landscape during the day will reveal its shortcomings when are pointed toward a planet or star in the night: the picture does not come together, chromatic aberration spreads, reflexes pollute the image, the stars deform approaching the edge of the field of view. Even US$150 will present real problems when looking at the night sky and you'll understand why there are those that cost about 2000 dollars.
Something that will make you confused, is finding that image increase is a totally different meaning than you imagined. The first thing you will hear from experienced practitioners when buying binoculars is to much increase is "very bad, and little increase is good." You will take longo to accept this, but will soon realize that a binocular with too much increase delivery very dark and absurdly blurred image, and a narrow field of vision, making it a great difficulty to find and watch what you want. You will find that the highest good increases are between 7 and 11 times. Above that you will need a very large and heavy binocular and a robust and high tripod (and both will be very expensive.
You will also find that, for astronomy, zoom is a nuisance that can undermine the quality and much observation, mainly to greatly reduce the size of the image field of view.
In the beginning you'll also hear about prisms and BaK4 BAK7 and will not understand the difference, the only thing I understood is that all the experienced say BK4 is best for those who want to use the binoculars for astronomy, sometimes without explaining the law because. When you look at a star with a binocular with BK7 prism and see how it deforms when approaching the edge of the image, you'll understand the difference.
A very common type of nonsense you'll find on sites like "Mercado Livre" are things like "Binocular with a range of 1km." It does not exist and who describes his binoculars so normally do not have the slightest knowledge about the product they are selling. Binocular is a product made by lenses. What they do is give more power to your eyes without changing its basic characteristics. As your eyes, binoculars can see to infinity if there is nothing in front of the opaque object.
If you are in order to find a good pair of binoculars on the Internet and live in Brazil, watch for addresses of two of Brazil's most respected sites:
www.astroshop.com.br

I believe that a good pair of binoculars to get started in astronomy has the following characteristics:

  • BK4 prisms.
  • increased from 7 to 11 times.
  • opening between 50 and 63mm
  • maximum weight of  three pounds.
  • Fully Multi-Coated Lenses
  • Visual comfort above 11 mm if you do not wear glasses and about 20mm if you use.
  • Price between US$100 and US$200 (in Brazil).
 Good luck with your purchase

The first pictures I took with a 90mm refractor telescope - Jupiter, Saturn and Moon

And now I'm starting to talk about astronomy here in my blog, I put here some pictures I took with my first good telescope. These were the first photos I could take with him.

The technique was more than simple. I approached the camera, a Polaroid 1.3 megapixel camera, to the lens and tried to photograph the image that appeared in the eyepiece. See the results:
Jupiter - The two main bands are visible. This image was very close to what I could see with my own eyes while looking at the Refrafor 90mm, with the difference that the four largest moons of the planet would be visible to my eyes, even their shadows on the planet.

Saturn's rings were clearly visible in this photograph, but no sign of the Cassini division, which was clearly visible when I was looking through the telescope with your own eyes

The Moon seen through a 25mm eyepiece

Here a view of a region of the moon at the time of the photo where the illuminated portion was mixed with the part about the shadows. It is usually where you can obtain the best images of lunar craters.

Here a nice detail that shows the Apennines mounts, with the large crater Copernicus left.
 
Here we can see the spectacular crater Tycho (right). Note that you can see that the impact of the meteor material spread across hundreds of miles.
These pictures were taken with a telescope like the photo below, an achromatic refractor of 90mm of aperture and 910mm of focal length, fixed at an alt-azimuth mount.

With a 90mm achromatic refractor you can take better photos than those shown, for this you will need a different mount (tripod), a most appropriate camera and, of course, more practice. But I got very happy with the initial result.

A big hug